Bag Care Tips and Product Recommendations #
USE THESE PRODUCTS AT YOUR OWN RISK. WHAT WORKS FOR ME MAY NOT WORK FOR YOU. ALWAYS TEST PRODUCT ON A SMALL AREA ON THE BOTTOM OF THE BAG TO MAKE SURE IT DOES NOT DARKEN LIGHT LEATHERS.
- Collonil Suede Protector – I find this excellent for waterproofing my suede and nubuck leathers.
- Collonil Carbon Pro Spray – Great for waterproofing my non suede leathers. I primarily use this for shoes. I’ve read of people spraying it on canvas and toile with success.
- Blackrock Leather’n’Rich – I’ve used this on my auth Hermès with great success. I use my fingers to rub this into small areas of leather. I Don’t rub too hard because it can start removing color. Wipe off before starting a new area. I usually use this on leather that needs to be cleaned. After first application I usually use Obenaufs and then follow up with a final coat of this (for auth Hermès) or Kiwi (Rep Hermès and other reps). Not to be used on suede or nubuck.
- Obenauf’s Heavy Duty LP – I use in between Blackrock applications. I’ve used this to waterproof my auth Hermès Gulliver, Swift, and Box leathers as well as rep Celine Box bags. I use my fingers to massage it in to small areas and have used a blow dryer on the leather (not too hot and not for long!). The heat opens the pores in the leather and allows it to better accept the treatment. Wipe off before beginning new area. Once done I let bag rest overnight before applying anything else. The next day I use Blackrocks again to shine the bag (on auth Hermès) or Kiwi (on reps).
- Kiwi Leather Oil – MY FAVORITE for my non suede reps! I wasn’t really satisfied with the shine I was getting by using Apple or Cadillac and happened upon this at Walmart one day. I don’t think I’ve used the Apple or Cadillac since. I’ve used this for a quick shine/protection on my bags as well as applying this and using a bit of heat from a blow dryer for reps that had dry leather (would NOT recommend this for caviar).
- Lexol Vinylex Protectant – It shines my Vuitton coated canvas. It will require reapplication on occasion as the shine wears off.
I know I didn’t say anything or give links to Apple, Lexol Leather, or Cadillac (which I just ran out of and ordered Saphir Creme Universelle in it’s place) because I find the products listed here work better for me.
Stains
You can use hairspray (weakest but less damaging), rubbing alcohol, and nail polish remover (strongest but could affect the leather) to remove ink stains from leather. Always make sure you spot test before you apply to make sure you are OK with how the leather will look after you apply and use as little as you can. I carry a lot of pens and wind up with ink all over my SLGs. I typically go straight to the acetone/nail polish remover since I want the quickest fix. It removes everything but tends to make the leather slightly duller where applied
Keep a small packet of baby wipes in any light colored bags and immediately wipe them down if you see any stains or color transfer
Storage
Stuff your bags when not in use! It will help the bag retain the shape. You can buy bag stuffers or use old clothes. I stuff my large bags with old sweatshirts and have bag stuffers from the container store for smaller ones.
If you’re like me and don’t store bags in dust bags, make sure you are aware of where you put them in your closet. Make sure they are not near a heating vent or too close to any lightbulbs. I have one big exposed vanity style light bulb in my walk in closet. I left some shoes and handbags that I rarely used on the top shelf and forgot about them for a while. They all dried out and my vintage LV’s strap cracked completely in several places. RIP.
Have a system to manage the chains/straps on your bags. I use velcro which you can cut into different sizes and create a nice little holder to wrap around the chains/straps when they are not in use. You just roll up or fold the chain however you want then secure it with the velcro. It is thick enough that it doesn’t usually cause any type of kink in the leather and you can set it up however works for you or the bag. You’ll never have to deal with a knotted chain again!
Repair
COBBLERS!! I comment this so often, but a good cobbler can do a lot for your handbag! They don’t care if a bag is auth or not. If they comment on the materials/quality it is most likely not them calling you out but letting you know about quality issues both so you are aware of it and so that you don’t blame them if anything goes wrong. In my experience good cobblers can swap out faulty hardware (though it wont be branded), repair damaged bags, remove stains, treat bags to make them water/stain repellent, and provide general maintenance on bags.
DIY Rep Care Resource Guide #
I personally recommend Lexol vinyl spray for LV canvas. When I bought LV reps 10 years ago, the rep canvas was much more shiny. These days, I find them to be dull. I prefer Lexol to Armorall despite the effects not lasting as long, because I find Armorall to be too shiny.
https://www.amazon.com/Lexol-1215-Vinylex-Protectant-16-9-oz/dp/B0002KKHS8
I haven’t used this product personally, but have read authentic Chanel owners using it to bring back shine to caviar leather.
https://www.amazon.com/Kiwi-Neutral-Express-Shine-Sponge/dp/B002YX0SH6
Finally, I want to warn against using this edge coating to repair glazing. It is much to shiny to match most bag glazing, including LV.
Leather Dyeing & Refurbishing guide #
Visual guide here.
LEATHER DYEING + REFURBISHING GUIDE
WHERE TO BUY: Many of these items can be easily found on Amazon. However, if possible, I highly suggest visiting a brick-and-mortar store that specializes in leather supplies to find a much wider range of products and full color range. Repairing garments and leather goods used to be much more common (nowadays – sadly – we just toss and buy something new) and these kinds of shops are dying out (no pun intended). There are still a few small, independent stores left and they are a wealth of knowledge, so I like to support them when I can. Both of these stores have thousands of products available in store and online. Two stores I specifically recommend are Manhattan Wardrobe Supply (NYC) and MacPherson Leather (Seattle). Both of these stores are amazing and sell online. Just look at what Manhattan Wardrobe Supply carries! I’m pretty sure they carry every leather dye or paint known to man and are often less expensive than Amazon! Staffers at both of these stores are also incredibly helpful and have helped me troubleshoot and suggested new products.
SUPPLIES NEEDED FOR DYEING
Link to images of some (not all) specific products I use Leather cleaner Leather preparer/deglazer Acetone Alcohol-based leather dye or leather paint (choose which one is best for you based on your project, see next page) Fiebing’s resolene or another similar sealant such as Angelus Acrylic Finisher. These ‘top coats’ will give a sheen to your leather, but if it’s not wanted you can buy additional products from the same manufacturers that will dull or matte-ify the finish Leather conditioner (I have used many and been happy with them all, but I can recommend Cadillac or Fiebing’s 4 Way) Nitrile gloves Microfiber cloths (I get giant packs of these and cut them up into more manageable strips) Paintbrushes (I use a variety of brushes but a fine-tipped small brush for detail work and a wider angled brush for edges and general painting work great) Wool daubers Roll of tape (not totally essential but I put this around whatever dye or resolene bottle I’m using so I don’t knock it over) Scrap paper, Tyvek, or whatever else to protect the surface you’re working on – dyeing can be messy!
THE DIFFERENCE BETWEEN LEATHER DYE AND LEATHER PAINT AND WHEN YOU SHOULD CHOOSE ONE OVER THE OTHER
I tend to use the blanket term ‘leather dye’ for all types of leather dyes and paints but technically there are different types so I’ll try to explain the difference here. Leather dye typically refers to an alcohol-based runny liquid with a water-like consistency and is highly pigmented. It will permeate any leather or porous surface it touches. It’s hard to control the spread of the dye because of this. Imagine dumping a bottle of hair dye onto your own skin – this is basically what leather dye does. I like to use alcohol-based dye for darker colored dye jobs that I want to be 100% color saturated and permanent. This stuff is really strong and when properly applied, does not transfer; people commonly dye leather saddles and furniture with it! It can be difficult to get an even color application on any color other than black, so you need to be very mindful of your application technique. Alcohol-based leather dye is best for black or very dark colored bags. It dries relatively quickly and besides drying it out (which can be remedied with conditioning lotion), does very little to affect the texture of leather. Color selection for leather dye is somewhat limited, although you can try to mix shades to get the color you want, or dilute them. Please note, there are also water-based leather dyes and oil-based leather dyes. For the sake of brevity I am only covering alcohol-based dye in this guide, as it’s what I have the most experience with and is more readily available to buy in my area. Leather paint is an acrylic-based varnish that is specifically formulated to adhere to leather without peeling, cracking, or flaking over time. It is slightly goopy in consistency and doesn’t spread everywhere the way alcohol-based dye does. When properly applied onto a clean surface and then completely sealed you should not have any issues with color transfer. Acrylic-based leather dye is best for vibrant, bright, and/or light colors. It is very pigmented and does a great job of coating leather with full saturation. Sometimes, when I want a very rich color, I will do a first coat of alcohol-based dye, and then a second and third coat with acrylic-based dye. There are probably hundreds of colors and finishes (metallic, pearlescent, glitter, etc) available in leather paint. Angelus is the standard brand, although there are others. In my opinion it’s easier to use than alcohol-based paint, but you have to be careful because more than 3-4 coats will start to affect the texture of your leather. Lots of sneakerheads use Angelus leather paint to custom paint their sneakers. It’s very durable when used correctly.
KEY THINGS TO REMEMBER FOR A SUCCESSFUL DYE JOB
90% of the work is preparation. Any other former chefs here? Mise en place, bitches! When you are getting ready to dye something, I like to envision my workspace à la Dexter. I cover everything in Tyvek or plastic and then put another layer of clean scrap paper on top. Do not use newspaper or ripped out magazine pages because the ink will transfer onto leather. Clean, clean, clean. Keep it clean! Sometimes it feels like I’m preparing for surgery when I’m dyeing or repairing something light-colored or fragile.
I like to arrange all my tools and supplies neatly, have a pile of microfiber cloth ready to go, throw a long movie on off to the side, and then get to work. Wear gloves always. Leather dye is no joke! Alcohol-based leather dye is extremely effective for dyeing leather, i.e. skin, so it’s also very good at dyeing your hands. Make sure you have durable gloves and are mindful of not knocking over the dye or getting it onto any part of the leather you DON’T want to dye.
My nice wool rug and lacquer furniture can attest to the potency of leather dye. Leather paint is also very potent, although errors can sometimes be cleaned up with a swipe of acetone or soap. It’s wise to just be careful from the beginning and cover everything that you don’t want to get covered in dye. …Which leads us to masking. If you’re only dyeing part of a handbag, or part of a shoe, it’s helpful to mask off the leather that you’d like to preserve with blue painter’s tape. To be honest, personally I rarely do this because I like to live dangerously and I’m impatient, but it’s a good idea, especially if you’re just starting out. I also recommend masking or covering any hardware like clasps or chains.
Acetone will usually remove dye from hardware if it’s polished, but it’ll be hard to remove from distressed hardware such as aged gold or ruthenium, which is porous. To clean up any dye from polished hardware you can use an acetone-dipped Q-tip, but be careful not to rub it into the leather. GO LIGHT. Seriously. The last small bottle of leather dye I used got me through at least four different handbags and two pairs of shoes. Leather dye is highly pigmented and extremely drying. You do not want to douse whatever you’re dyeing; it’s going to look terrible. Think light, even coats – similar to a nice manicure. You don’t want the dye to absorb into the lining and you don’t want it to turn out blotchy. Sometimes I can get away with waiting 15-30 minutes between coats, and sometimes I wait overnight. It depends on the leather I’m dyeing and how long it takes to dry.
Sometimes I’ll use a wool dobber to apply black or other very dark colored dye but daubers tend to soak up too much liquid and it’s hard to control how much dye gets released into the leather. For better, more even results I usually use a combination of different types of paintbrushes and a small microfiber cloth soaked in dye, which I buff in in a fast, circular motion. Sometimes things don’t go your way! Whenever you dye something, there is always a risk that it won’t work out. Unless you were present during manufacturing, who knows what special treatment or chemicals got applied to the leather and might impede dye penetration. I’ve had good results with almost everything I’ve ever dyed, but there is always a risk something won’t turn out how you want. In case the color doesn’t come out the way I expected, or ends up being too dark, black is usually my fall back color.
You can dye almost anything black successfully and fortunately it’s great at masking mistakes (bonus, most people tend to use black leather goods the most anyway). If you are unsure about how your leather will respond to dye, try dyeing a small part of the leather on the interior or bottom of the bag first, and then proceed according to your results. BE THOROUGH AND HAVE FAITH. Up until the last few steps, whatever you’re dyeing might look terrible. Sometimes the dye will give off a purplish metallic sheen. Up until the last coat of dye or application of resolene, it can look patchy. Alcohol-based dye is stinky. It really dries out the leather. Persevere! After you finish all your coats and start applying resolene and leather conditioner, your leather will shine. It’s like watching one of those makeover reality shows. Sometimes I’m straight up shook. Simply conditioning leather and dyeing it can totally transform it, and for a lasting, durable finish it’s important not to skimp. It’s tedious, but important that you do all the steps, and in the right order. I’ve never had a problem with dye transfer or color coming off with water but correct application of resolene, conditioner, and proper buffing is essential. Sometimes I see bags turn up on Ebay or Poshmark like this. Eek! This could have been avoided with a thorough cleaning in the beginning and better dye application and acetone use. Any residual dirt or oil will interfere with the dye penetration.
STILL WITH ME? LET’S GET DYEING!
Different types of leather need different methods of dyeing. I think pictures explain the steps better than words so photo albums with steps are linked in the item names.
DYEING TYPICAL LEATHERS LIKE LAMBSKIN OR CALFSKIN
Basic Steps:
Clean the leather Strip the leather with leather preparer/deglazer Apply dye (however many coats needed) Buff away excess Apply resolene (I like 2-3 coats personally, but sometimes one is enough) Buff away excess Clean hardware with acetone-dipped q-tips, if you got any dye on it Condition!
Auth Christian Louboutin Fifi lambskin pumps – alcohol based dye
Christian Dior Lady Dior lambskin cannage bag (alcohol based dye with final layer of acrylic based dye)
Chanel Boy bag in calfskin (187 Factory) – alcohol based dye
Auth vintage Chanel caviar wallet acrylic based dye
YSL SDJ in croc (OC Factory) – base layer of alcohol based dye and then acrylic-based dye
Not all bags have to be dyed black!
DYEING PATENT LEATHER OR POLISHED CALFSKIN
A lot of people say that dyeing patent leather is not possible. I’m sure every leather is different and YMMV, but I’ve had great success dyeing patent leather. Buffing away the excess dye with acetone is crucial. Basic Steps
Clean the leather Strip the leather with leather preparer/deglazer Apply one coat of dye Soak a microfiber cloth in acetone and buff away excess dye – be prepared for a lot of dye to come off at first, it’s normal! Your cloth will be soaked in dye, but the color should remain on the leather. Repeat the dye/acetone combo until you get the color coverage you want and less and less excess dye comes off. Eventually very little to none. Clean hardware with acetone-dipped q-tips, if you got any dye on it Condition!
TROUBLESHOOTING
Ok, so I dyed the bag but what about the chain?! Ahh, dyeing a leather chain strap (like a Chanel Classic Flap or Gabrielle strap, for example). Unless you want to make an absolute mess, you will need to un-thread the leather from the chain to properly dye it. Yes, it’s annoying, but I guarantee it will take you much less time than attempting to dye it while it’s still threaded in.
Not to mention, it’s not possible to get a thorough dye application while the leather is entwined in the chain. It’s actually not that hard to dye it separately, it just takes a long time. If there is a thread attaching the leather together I will snip that with small scissors or a seam ripper.
Then I’ll use my fingers or sometimes a long tweezer to help get the leather out, being careful not to stretch it. I dye it using the same method used for the rest of the bag. After it’s been sealed, I thread it back into the chain, and then, using a needle and matching thread, I’ll re-affix the small loop securing the ends of the leather strip together. Doing this requires basic sewing skills, but it really is easy to do and literally just takes a minute. What about the zipper tape or lining of my bag?
If the fabric is cotton it can be dyed using the same dye you used for the rest of the bag. It may take a few coats to get fully saturated – it’s better to go light and do it in steps. If your zipper tape, lining, etc is nylon, then you can dye it with acrylic-based dye. Nylon will not absorb alcohol-based dye. What about spot dyeing? Did you get some color transfer on your bag, or some scuffs? If you can’t clean it off with leather cleaner then you can spot dye it.
You will need to match the color of your leather to the paint you are using. Sometimes you will need to mix it yourself, but with a little practice or arts ability it isn’t too hard. Angelus makes small 1 oz. bottles of dye that are great for this.
To touch up small spots you can either use a small paintbrush or a small piece of microfiber cloth to buff it in. Personally I would not use alcohol-based dye to spot dye leather because it is too runny and hard to control, not to mention it will be very hard to match the color. Also, sometimes I see a Magic Eraser recommended for color transfer – the way that works is because melamine (which is all a Magic Eraser is) is an abrasive agent that scrapes away the surface of the leather.
I don’t know about you, but I’d rather clean and restore the color of the leather than thin it with something that literally disintegrates it. I have a black/dark-colored leather bag/shoe, can I dye it white/another light color? I don’t recommend it. It’s similar to trying to dye black hair blonde.
Can you do it? Sure. But it will require so many coats of dye and be so drying that the final texture will suffer.
It’s better to go from light to dark, or keep things roughly in the same color grade. What about suede? Yes, you can dye suede! You need to use a specific type of dye and finisher forumated for suede in order to retain its texture. Sorry I’m not covering it here, but you can find out more about dyeing suede on online leatherworker forums or at the stores I listed in my supplies list. Can I dye patent leather a light color? You can try it, but in my experience, no, you can’t.
What about the heat stamp? How do I preserve it? I’ve had luck with two techniques. With alcohol-based dye, you can apply the dye over the heat stamp and then almost immediately take a clean microfiber cloth and swipe it over it. The cloth will pick up the dye, but leave the heat stamp.
If you are using an acrylic-based dye you can use a very fine-tipped paint brush and color in between the letters. It takes a little time but if you’re careful you can do a good job and preserve the stamp. Eh, I’m afraid the color will transfer on my clothes or get all over me when it rains… If you dye and seal something correctly this isn’t an issue at all. Almost all leathers in the garment/handbag/footwear/accessory industry are dyed. Correct application is key. If you are unsure or nervous about it then make sure your application of resolene or sealant is thorough and do a rub test with a cloth when you’re done.
I’ve probably dyed half my own shoes and handbags at this point, and been caught in many rainstorms, or gone on long walks with my bag bouncing repeatedly against my clothing…no issues. Pfft, I would never dye leather or buy something that had been dyed – the texture changes! I can always tell when something’s been dyed…it never looks the same… It’s funny, but I come across this sentiment often, especially on the TPF (which, after being an member for nearly 15 years, I can honestly say is full of psychopaths). I think most people who say this haven’t actually handled something that’s been dyed properly. As long as you use light and even coats, the difference in texture or softness is either nonexistent or negligible.
Whew! When all of the steps are followed correctly, you should have good results. I work in manufacturing and have been dyeing leather goods for over nearly fifteen years. I’ve rarely had any major failures but that said, this is not a quick or easy process, and it doesn’t always turn out how you expect. If you are not a neat, methodical person, I would think twice about dyeing or altering something you love.
The steps are straightforward but it can literally take hours, if not days, to repair or simply dye something. There is a reason why luxury good refurbishment companies charge hundreds of dollars to do this! With thoughtful upkeep and maintenance almost any wellmade leather good can last through years of use, if not decades, but it requires time, patience, and skill.
Interested in Further Refurbishment?
In addition to dyeing and touching up leather, you can also re-glaze edges, use filler to restore pitting or missing sections, polish hardware (Brasso on tarnished Louis Vuitton hardware is a revelation!), remove and restore the gold plating on hardware, and replace handles, hardware, or even whole sections of leather entirely. There are high quality products and resources for all of this. Reading up on the links below is very educational, and of course the more experience you gain, the easier refurbishment becomes. Other Resources Youtube – There are probably hundreds of DIY videos going over handbag and shoe refurbishments.
Some are iffy, but some are pretty good! This one in particular is one of my favorites. Leather Cleaning and Restoration Forum Leather Worker Forum The Purse Forum – Do a search, there are loads of TPF renegades who were brave enough to dye their bags with good results! Renovluxe Instagram – Probably my favorite Instagram account to follow for leather dyeing before-and-afters and process videos Purse Rehab Instagram – I like checking out the before-and-afters on their account The Handbag Clinic Before-and-After Album – this company in the UK has a nice gallery of their work showing what’s possible with dye and some love!
How to Fix Wrinkled Leather #
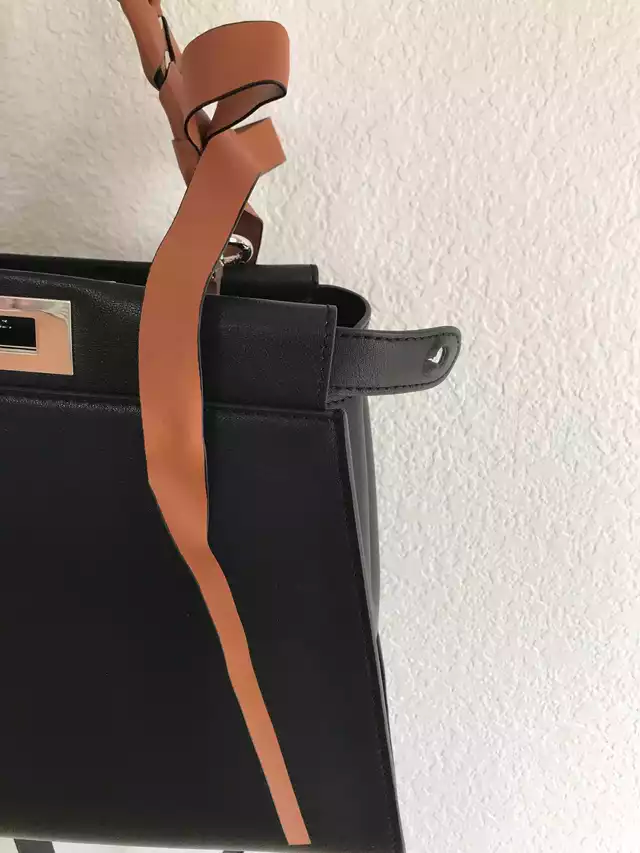
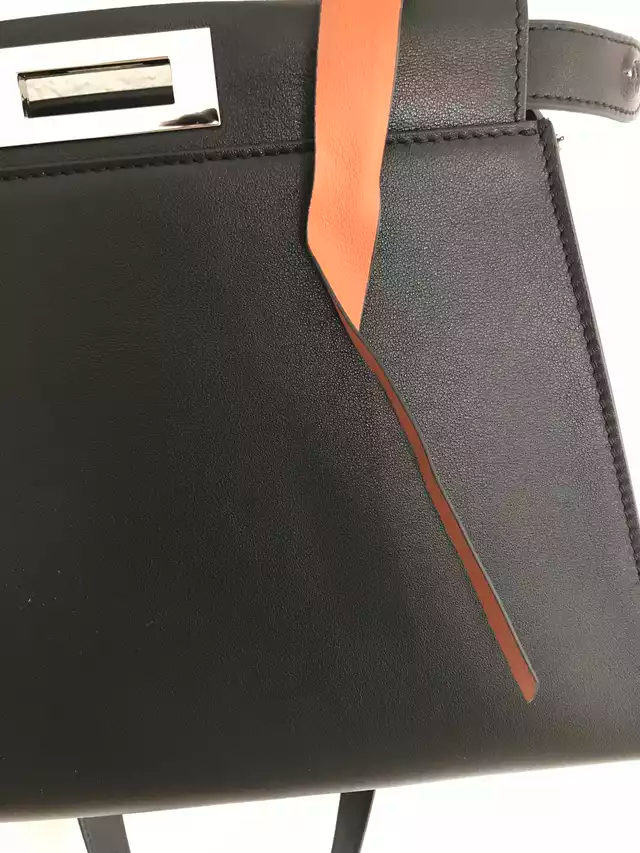
As you can see from the photos the leather got pretty wrinkled being wrapped up.
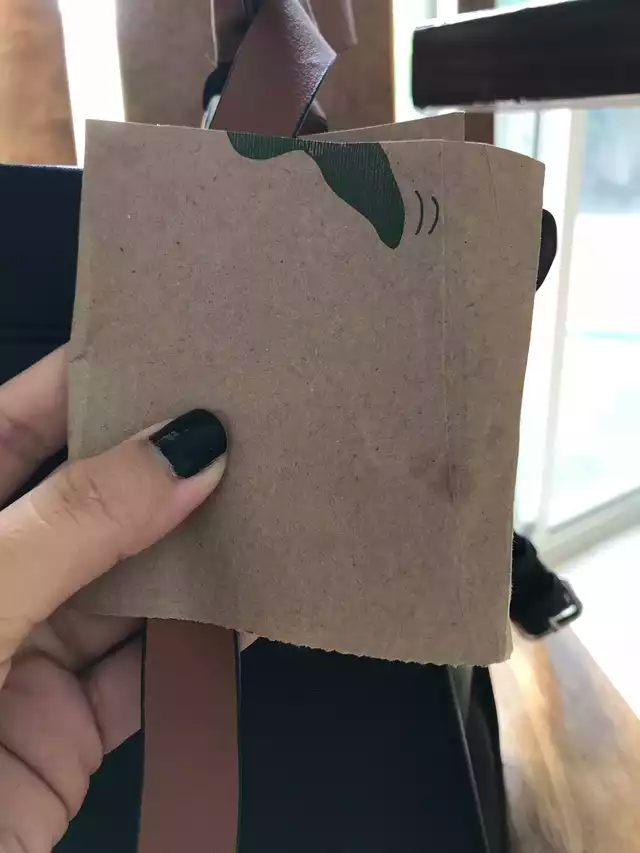
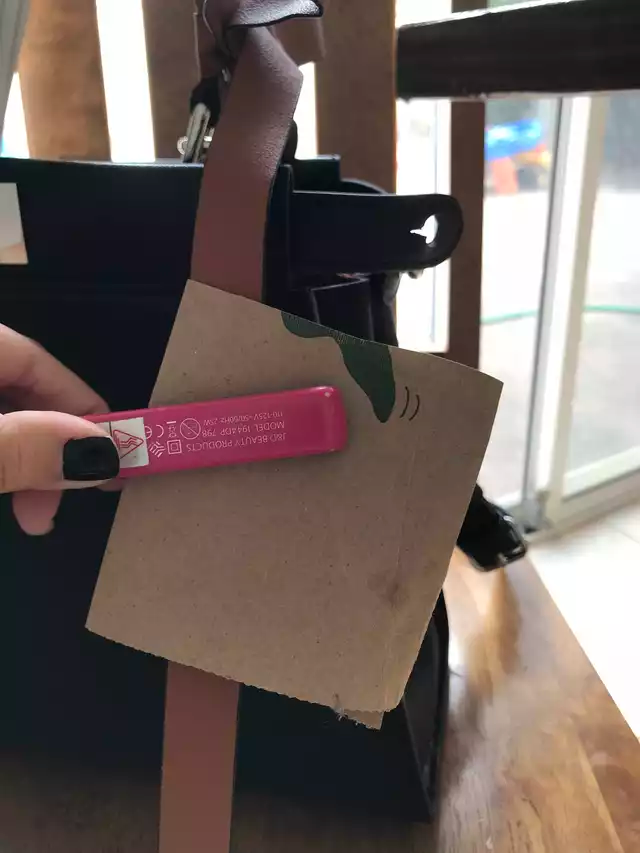
I used a travel hair straightener that only has one setting so I can’t really comment on temperature and a brown paper bag for protection.
Basically I just wrapped the leather in the paper bag and moved my flat iron up and down
On the really bad crease I let it sit clamped for like 3 seconds, checked it and reclamped it for another 3 seconds, and repeated until it was out.
I used a bit of leather conditioner at the end but honestly it didn’t really need it.
How to Remove Stains and Glue Residue #
There are solvents used in leather/PU manufacturing industry that you can use to doctor the glue and stain issues of your hauls. I’ve read many reviews with this complaint.
1- AFTA
This removes glue residue on a multitude of materials. Most cobbler shops carry it. It’s also available on Amazon. (Always test a hidden spot if at all possible since glaze or material finish might be affected)
This is your best friend for glue/ cement removal. And, of course, an eraser ( I have many colors to match leathers). More specifically, Gum erasures are the type to buy. The number 2 pencil ✏️ types might damage suede, etc. Remember, the glues used in shoe, handbag and belt manufacturing is “contact” glue(cement).
2- LEXOL This is a stain remover that is a must in your stain Arsenal for not only bags, shoes etc. it’s a great product for home use. Again, Lexol is widely available in cobbler shops and Amazon.
I’m a stain removal nut/guru as I’m a mess and destroy my stuff. This, and I worked in footwear factories in China as a developer for many years. Prior life. Now I just like to shop.
LV Patina Methods and Tips #
Since joining this sub about a year ago and several purchases (some unwarranted, some unnecessary, some great, some better, some the best,…) I always struggled with patina on my Louis Vuitton purchases from various Trusted Sellers. At this point, it has become a serious issue/condition for me (and possible other PCRL) which are as in love with some nice honey-brown patina as much as I am and equally as impatient as I am, then this is quite an issue to deal with. (yes, you may so why not just go with second-hand authentic/vintage? Because I am being difficult and don’t like used bags.)
In this thread, I would like to share my probably slight to a severe obsession with patina (certainly ridiculous to some others) and the lessons I have learned from applying some of the techniques mentioned below to achieve patina and/or clean your vachetta leather. Bear with me and grab a cup of tea or coffee or flute of champagne or glass of wine whatever floats your boat….
1) The long wait to see some change in the initially very white vachetta leather
You finally get your long-awaited (2-3 days DHL when OC ships out 😉) bag and can’t wait to wear it out but something bugs you a bit: The leather is WHITE. Almost as white as snow. Hmm, that makes you wonder: “Does it make the bag look even more like a rep?”, “Who will believe me that I just bought a +1K bag brand new?”. Again my dear PCRL, shine your shine, your yé is different from their yé, let me tell you that. Using your bag a couple of times during a very warm sunny day will certainly kick-start the patina process. I once read somewhere, that once upon receiving a new item you should let it sit in your windowsill for a few days, turning the item over every other day or so to allow the patina process to kick-start. This supposedly will allow for less irritation to occur on the leather as well as protect the leather itself. The good: you will certainly see a difference in a week in the look of your bag and if what I read is true you will have created a natural protection film for your bag. Apparently, the all-white leather is more prone to stains, water-stains, oil stains, dirt and the like. Having some initial patina will guard it better.
2) TANNING: The sunbathing/solarium bathing/car bathing (you name it)
My dear PCRLs that do either of these are serious about not wasting any time on getting their patina-game started! Basically, you continue what you started above or take it to a next level: You sunbath your bag by allowing it to sit under the open sun for hours, turning it once in a while to achieve an even darkening on all sides. This can be literally done anywhere: in your garden, at your window, in a parking lot, in the park, at your rooftop, etc., the list goes on and on. You do this for however long you wish to until you feel you have achieved the patina of your liking. Through the direct exposure to light and heat the leather processes faster. However, be aware of “grilling” or “frying” your bag. This occurs when the bag has been exposed for too many hours to too much light exposure. So do this at your own risk, keep an eye on your bag throughout the process and make sure you flip it like an omelette once in a while. 😉Same goes for the solarium bathing. DISCLAIMER: I haven’t done this myself, however, I have read on here a couple of times of fellow serious PCRLs of purchasing tanning time in the studio and pushing their bags under the sun-bed for a couple of minutes. I believe it wasn’t for all that long (approx. 3-7min) with rotation and repeating the process weekly or every other day. Yet to see some progress pics, so if you dear reader are one of those serious PCRLs, kindly share your process pictures with us. Love to see them When it comes to car-bathing/tanning which I too haven’t done yet, it seems to be the simplest form and very easy to do. It’s like microwaving your bag: simply park your car in the sunny spot and lock your bag up in it and that’s it, done. This is probably a great option for the forgetful PCRLs among us who tend to leave their purses in their cars anyways. Still, I wouldn’t recommend this to all, due to car theft and the possibility of actually melting your car ?!
3) The pink/salmon coloured patina stage
For many PCRLs, the pink stage is a very difficult one to bear that is if they are seeking to quickly obtain the beloved honey-brown colour ASAP. It seems to be a strange in-between stage with no certain end in sight. When your leather starts getting that salmon-touch of pink you start to worry: “Does it make my bag look all call-out-able?” “Uuuurgh when will this start to get honey-like?” “Will it ever get honey-like?” ”I don’t like this!!!”. An ongoing cycle of worries and you start wearing your bag less and less. BUT do not do that! That’s exactly what the evil spirits of RL-haters want you to do. DO NOT PLEASE them but stride your shine. Take your beloved one out, live your best life and enjoy that baby. Trust me it will thank you later for that, through (now take a wild guess) a beautiful honey patina (hopefully).
4) the olive/mink oil/leather conditioner situation
Now this my dear PCRLs I believe all know is the most debated patina-enhancement process of all. Some say it destroys your vachetta leather. Others swear by it, saying it makes the leather settle, subtle and evenly “patinad”. The tale is as old as leather. The issue being: applying any great amounts of oils on your bags may create severe leather issues or damages in the future such as breakage, dissolving of the leather and leaking of the oil back to the surface causing oil stains, the leather going rancid and the mere application of foodstuff on your bag being weird to some. Additionally, oils tend to have their own colours and as such may leave some colouration on the leather of your bags making it take up an orange-like, pink-like, dark-brown-like colour later on. The benefits some love about applying oil is that its an easy fix for changing the appearance of the leather and also makes the leather softer. Leather conditioners, on the other hand, seem to be a safer alternative for those looking to enhance the patina process. Most of them do not change the leather colouration too much and also do not speed up the process of patina as much as the above mentioned, however, they manage to keep the leather soft and guarantee for fewer chances of breakages and cracks. Your bags will certainly be nicely taken care of.
A few products that commonly used:
- Honey Leather Conditioner
- All Armour Wipes
- any type of leather conditioner available in your region, to be honest
5) The baby wipe method
This method seems to be a very promising one in keeping an even patina on your leathers by wiping down your bags regularly with oil-free baby wipes which will remove excess oils and dirt from the vachetta leather, allowing for a clean even leather to peek through. It will however also slow down the patina process, as you keep removing the top-layer of patina (dirt, oils, stains…) from your bag. Nonetheless, it will certainly leave your bags with an even patina on all fronts.
6) The Patina Champer
This is for the serious of the serious PCRLs. In fact, this process is much more of a cleaning process than an actual patina-enhancement process. It is still worthwhile of mentioning as it does affect your patina process, is able to remove severe dirt from the bags, as well as oils and a certain level of stains. There are several threads on here and TPF as well as Youtubers that explain the patina champ method vigorously detailed and are easy to follow. Google is your friend – if I try to type it up, I’ll probably make mistakes. Given this article aims to bring to you a few lessons learned from a PCRL, I, unfortunately, have no real lesson learned from the patina champ method, however, have read only good things about it.
All in all, the true lesson learned that I can say is (which ultimately goes back to basics):
Use your bag.
Use it a lot and WAIT.
Through usage, all your oils from your hands and hand cremes and what not drops the leather will patina with it. Also the more you use your bag the more sunshine and air it gets exposed to and as such it will develop a patina faster. Bags that sit in storage will eventually also develop a patina, as these aren’t vacuum proof and air/sunshine will still seep through and cause oxidation and as such darken the leather, albeit slower than when in usage. I have included a few links to pictures here and there of my different “looks” achieved (some bags I have long sold, others still in my dear possession and care).
How to Fix Red LV Glazing #
I received my speedy 30 from Tina this Monday. I have no eye for LV but the red glazing is a big giveaway for me. When I received the bag everything seemed fine to me, until I was walking into work at 8 am & the sunlight exposed my worst fucking nightmare. This cherry red I read a bunch of reviews and order these lovely Rejuvenate markers. I used the mahogany which is #5. I thought it looked a bit too purple but I trusted the RepLadies! Also #2 was a dried out train wreck so ignore that.
I do have a auth mini pochette with small glazing which is the color I was aiming for.
The handles seemed perfectly fine to me compared to the rest of the bag.
Here is a upclose before and after. Before & after of the side of the bag.
After I finished the handle compared to the small piece of authentic glazing I own
Here are some outdoor after pictures.
Poodles included. As well as some of my mistakes I made on the handle. Oh well.
How to Correct the Touching VU on the LV Damier Print #
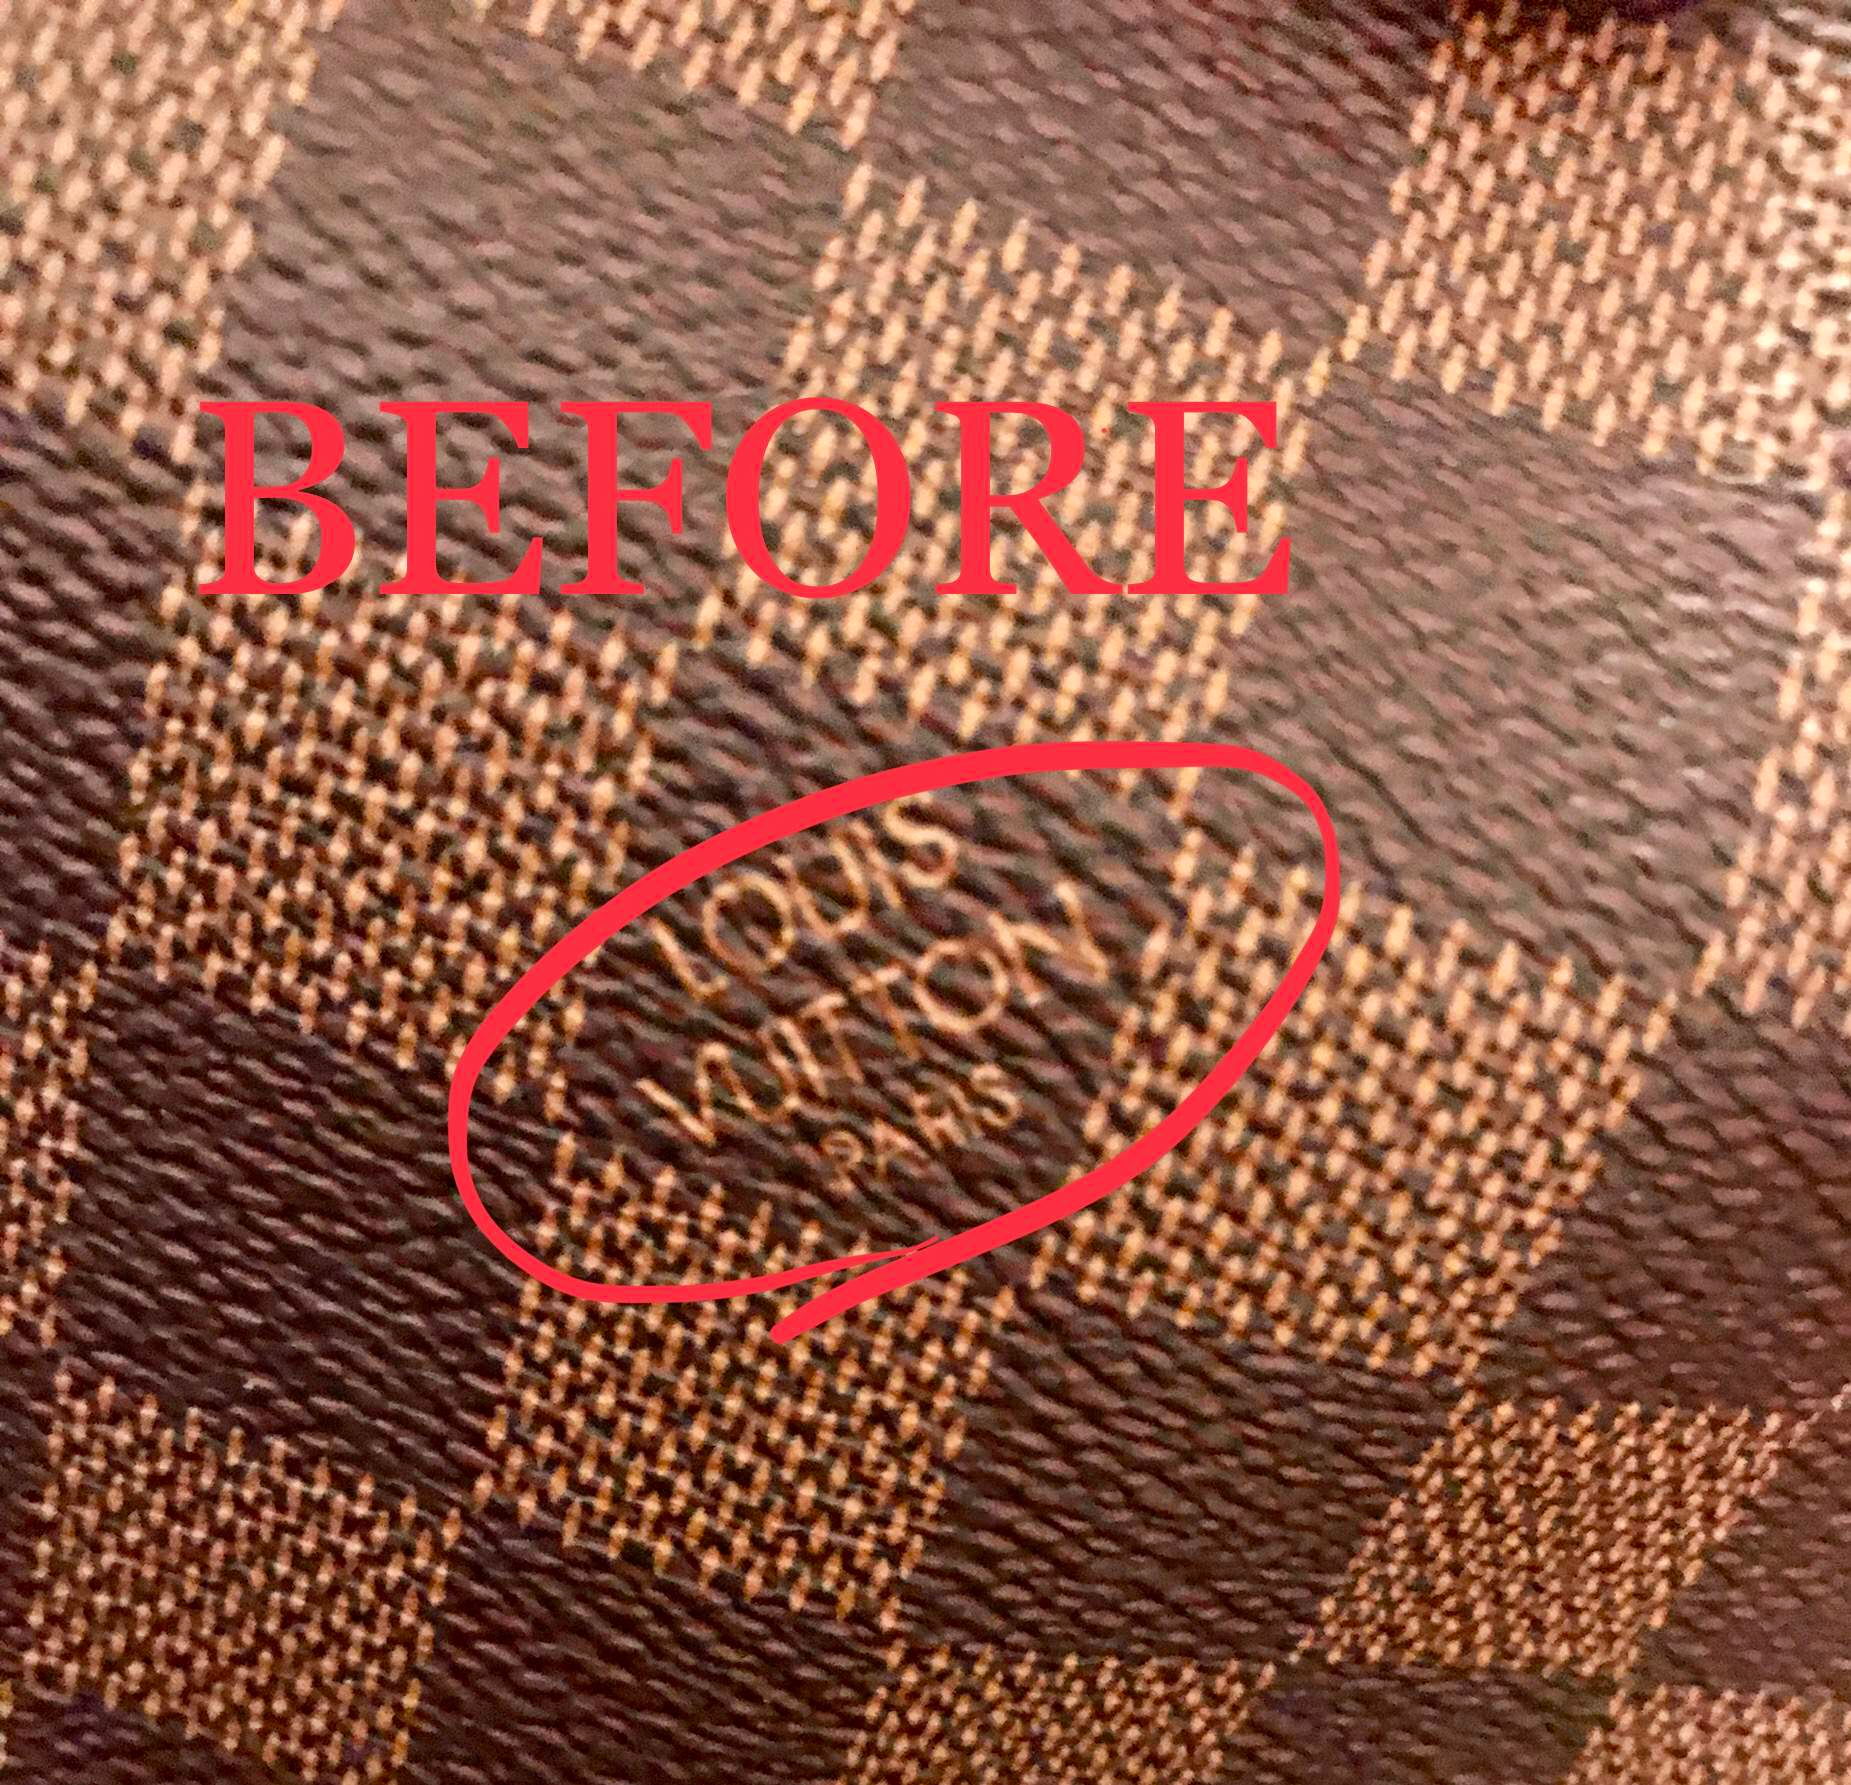
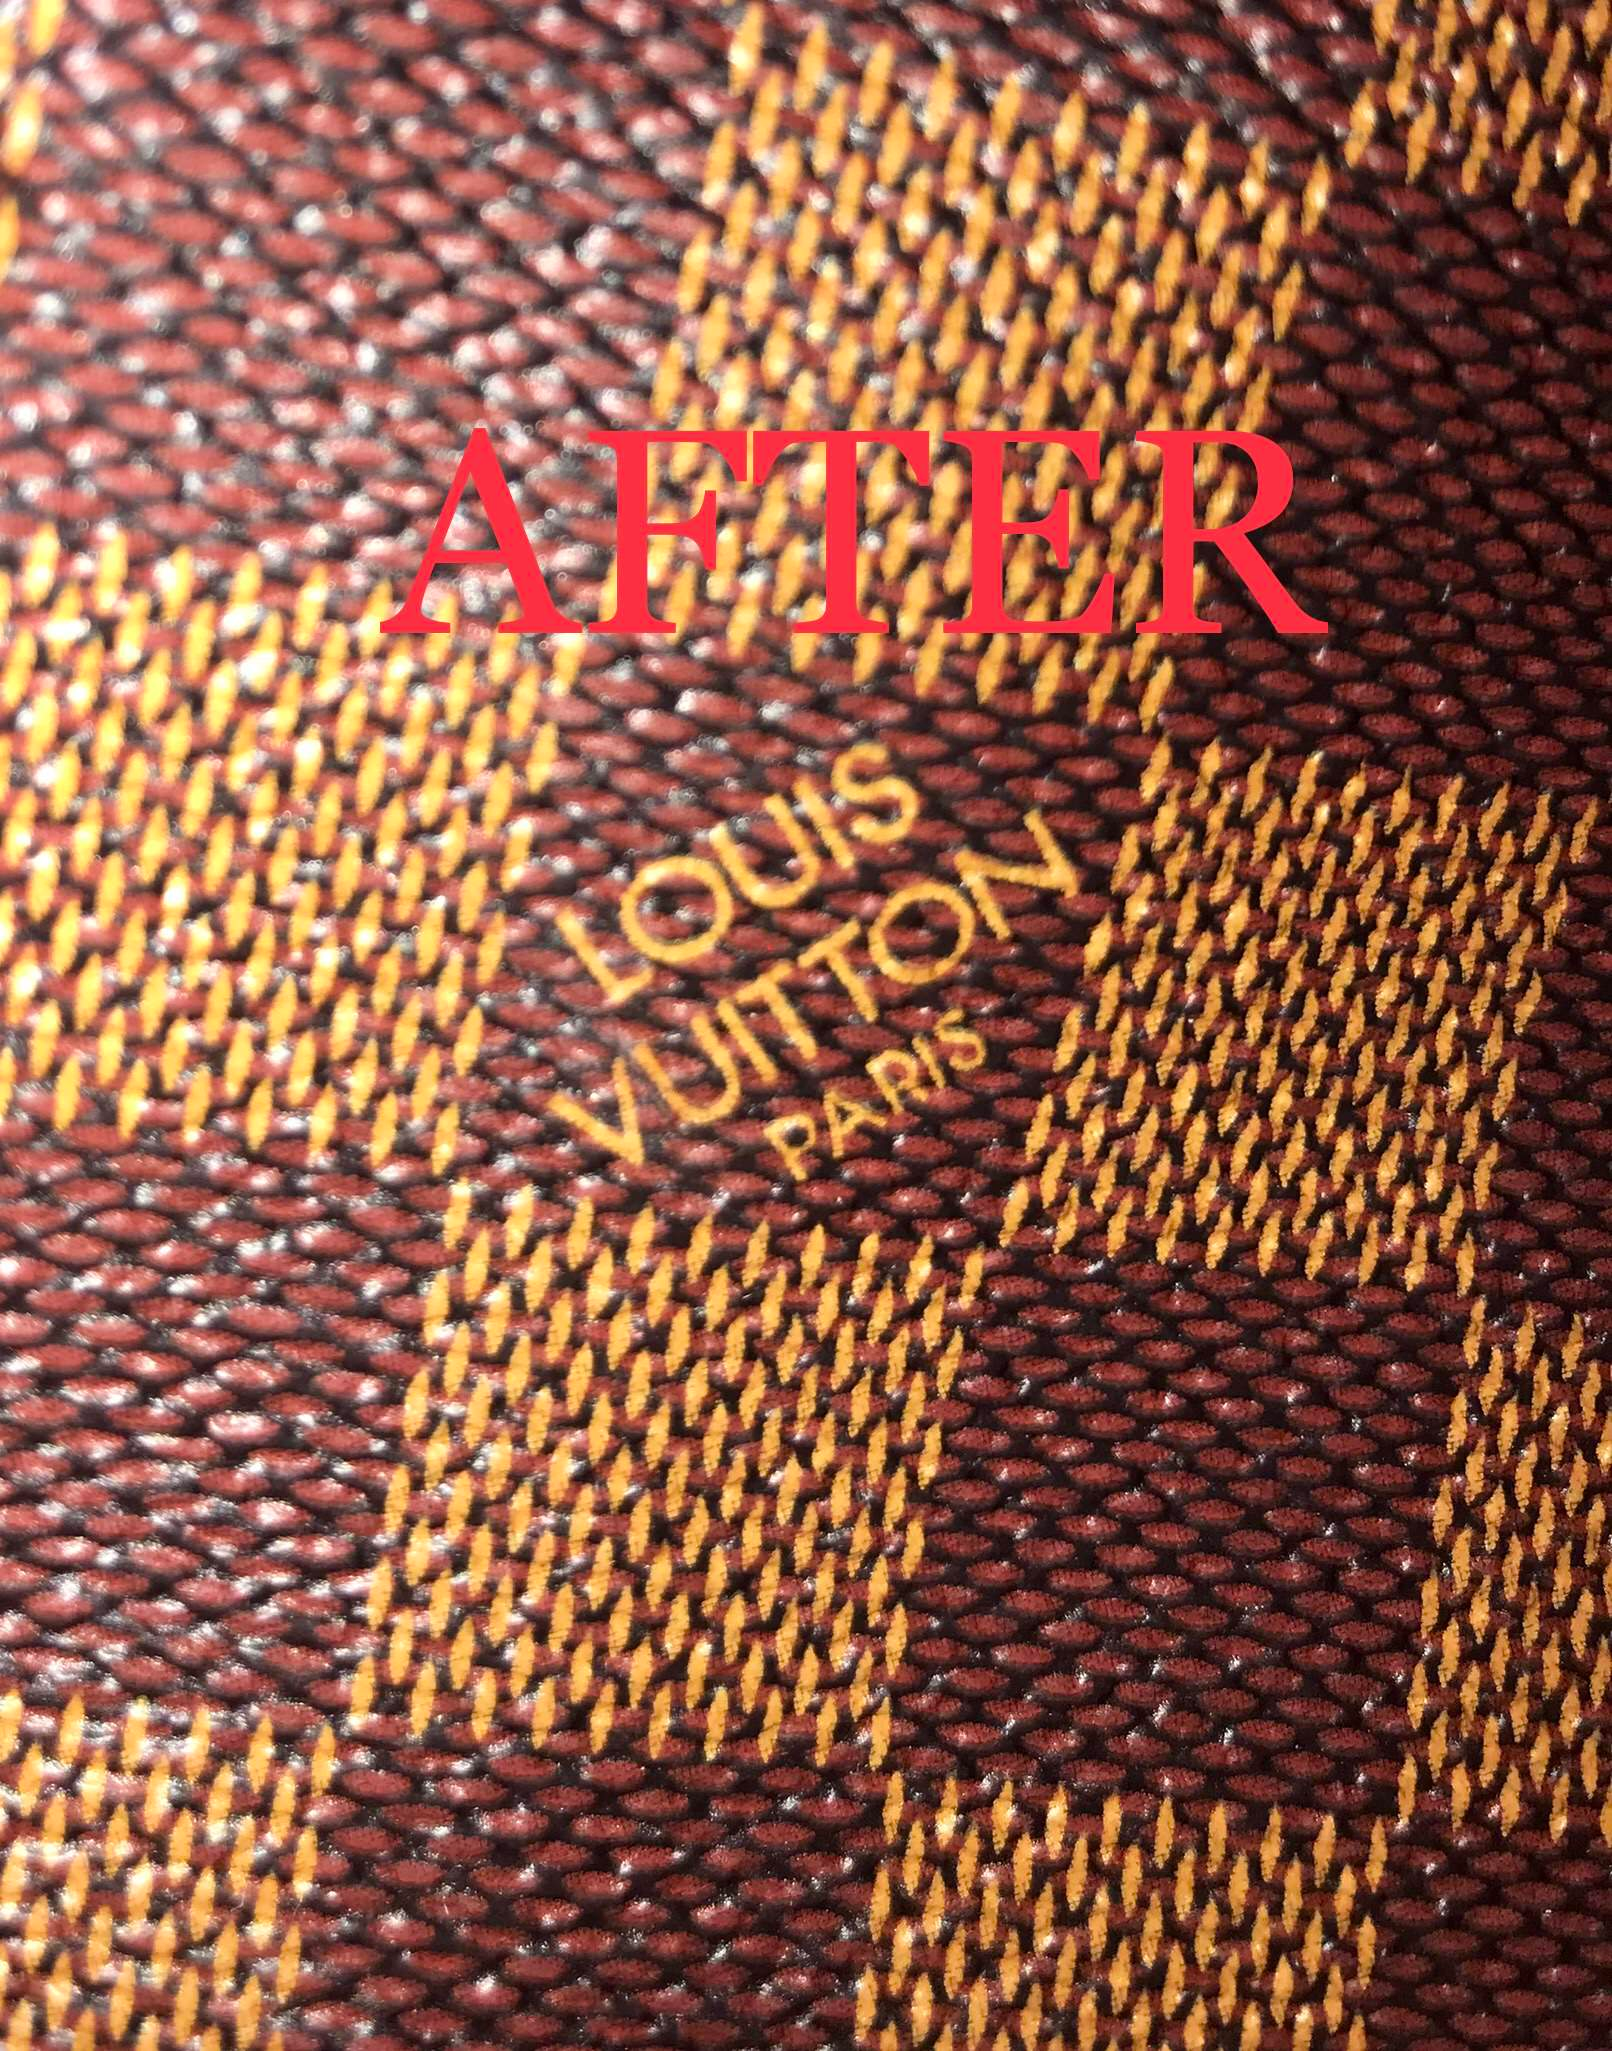
I recently purchased the Neverfull MM in DE print from the Old Cobbler (TS). I was really glad with my purchase BUT was upset to see all of the VU’s in Louis Vuitton were touching, which can be a call-out for a rep.
I was trying to find a guide post about how to fix this, and found that some people have used nail polish remover to fix this problem. Although the nail polish remover did help, I needed a little more to fix the print problem.
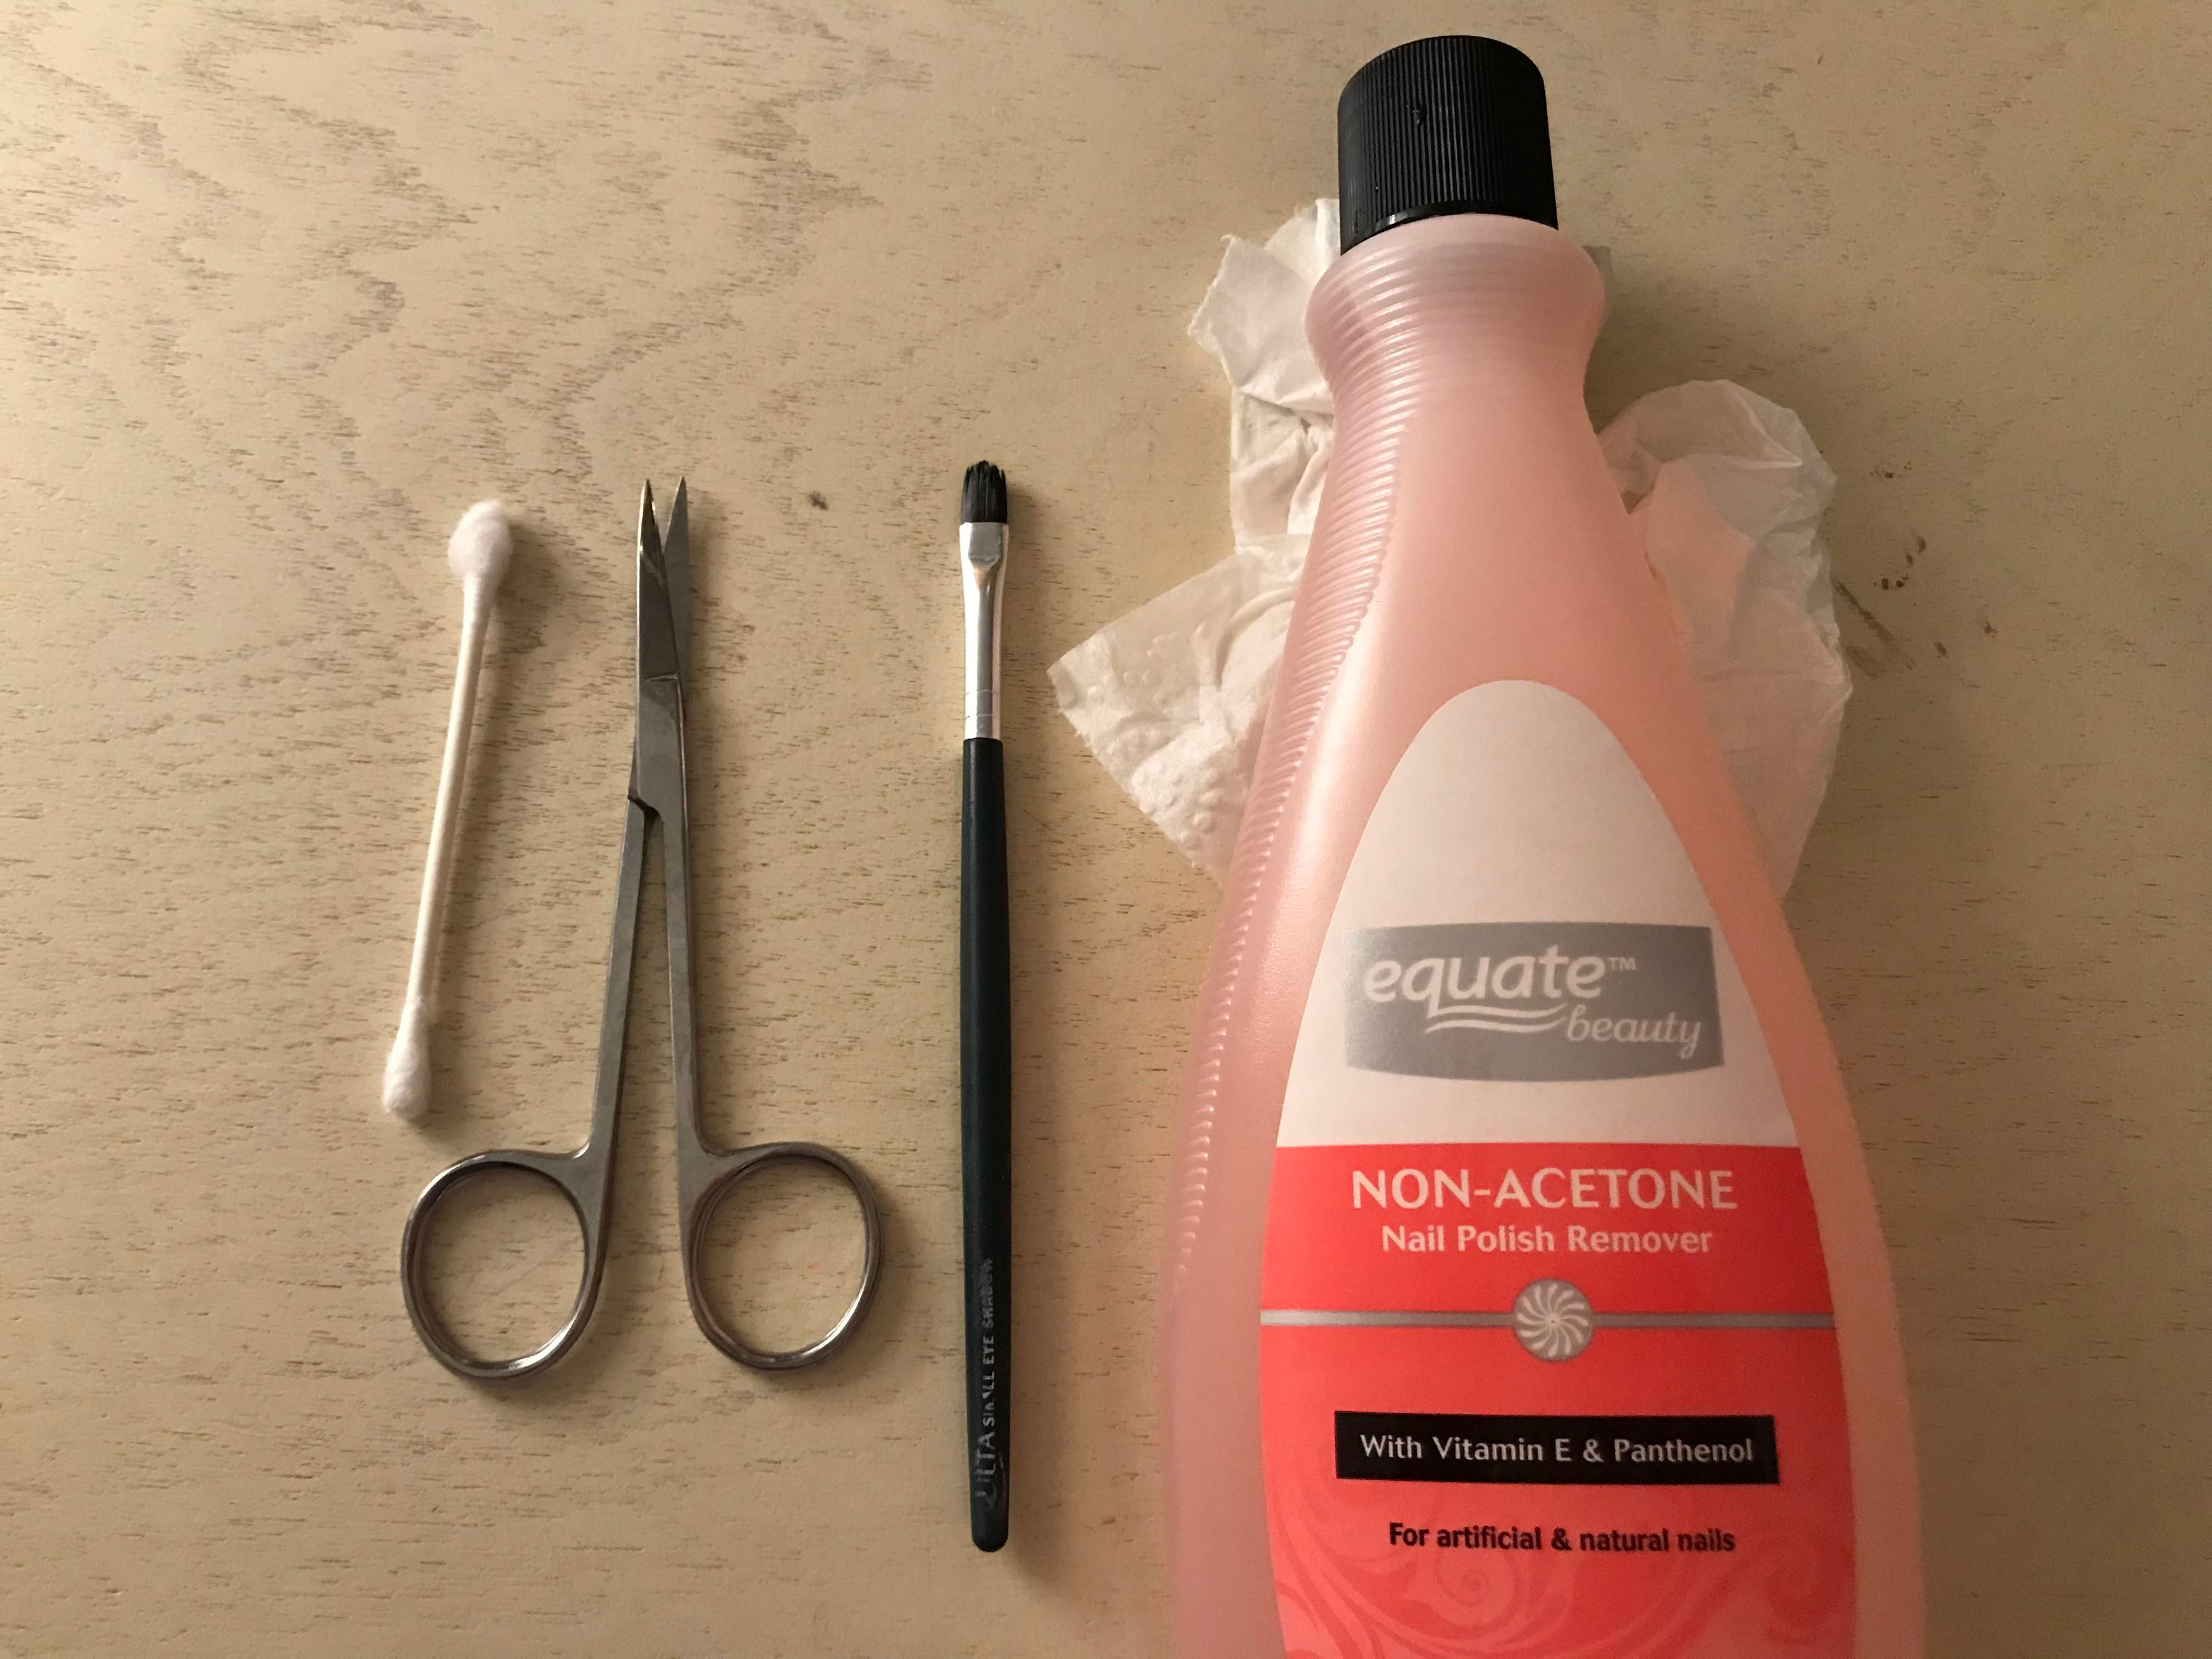
I used a stubby tiny pair of beauty scissors to fix the remaining touching VU’s. Below I listed a description of how I did this as well as photos!
- First, I used a small makeup brush dipped in nail polish remover to brush where I wanted the text to disappear.
- Next, I took the scissors and made it so I was only using one half of the scissors. I pushed the blade between the V and the U and pressed down lightly and pushed up. I repeated this step if I felt that the V and U were still connected.
- Finally, I wiped off the excess nail polish remover with a cotton swab.
Now, I am really happy with how this improved the appearance of my bag. I hope this helps anyone else who loves this print of LV bags but doesn’t want to be called out for a rep!
How to Alter the Tab Size on the LV Pochette Metis #
In this tutorial I will be walking you step by step through shortening the tab on your Pochette Metis. I got mine from the Buy & Sell forum, and I’m really happy with the quality but like almost all other reps of this bag, the tab was too long so I decided to give mine the snip! All in all this is not difficult, a little scary but it only took me about 20 mins and wasn’t nearly as difficult as I imagined.
Here is what my tab looked like before fixing it. Approximately 17-18 mm:
Here is a picture of the tab on an auth generously provided by /u/savinforcollege. Approximately 15 mm:
Here is an auth with a horribly wonky tab in the correct length in the black Empriente.:
http://www.fashionphile.com/louis-vuitton-empreinte-pochette-metis-noir-black-178289
As you can see I needed to shorten mine by a couple of mm to have a more accurate look. Let’s get to it!
Here are pictures of each step, with these same descriptions in the appropriate places and a few extras descriptions here and there, but the main instructions are all here:
Materials: Scissors, a hair straightener, Loctite glue, 80-grit sandpaper, a measuring tape or ruler that has mm and cm, a precision screwdriver kit and a little piece of a dryer sheet.
- Start by removing the hardware from the bag, using a small piece of dryer sheet to protect the screws from getting scratched.
- Lay all of your materials out and measure again.
- If your tab is glued together at the bottom like this, pull it apart carefully.
- Cut it right on the line where the indentation from the hardware stops. This is the scariest part, obviously try to cut straight!
- Put the hardware back on and check the length.
- Sand the inside edge of the piece you just cut. I used 80 grit and that worked well but anything rougher will work too.
- Flatten out the tip you just cut with the straightener, set to high.
- Put hardware on and check length again, overlapping your new edge into the indentation where it will be covered by hardware and figure out where it needs to sit.
- Put a small line of glue at the edge of the indentation where the hardware sits, on the inside, and overlap your new edge onto it. Hold it together until it dries. It dried really quickly.
- If your length is good and everything looks straight, go ahead and glue the second piece back on, making sure that it overlaps the other cut edge.
- Measure and if everything looks good, put it back on your bag, again using the dryer sheet to protect your screws. Make sure that you put the tab back on so that the cut edge is hidden on the inside by the purse and not in the front.
Overall I’m really happy with the way this turned out! It was a bit scary cutting and gluing on a new bag but it worked really well and the glue seems really sturdy so I’m hoping it will hold up. If for some reason it doesn’t, I plan on putting a couple of stitches through the overlapping on the inside.
Good luck everyone! I hope this goes well and we won’t have an influx of ladies begging TS’s to send extra tabs!
How to Fix Minor Alignment Issues on the LV PSM #
Materials:
Thin Paintbrush 100% acetone Q-tips Cup of Water
Instructions and Pictures here: https://imgur.com/a/A5x9E
- Dip thin paintbrush into 100% acetone
- Paint it on the Mono that you want removed.
- Repeat steps 1 & 2 until it’s all gone. You may want to pat the paintbrush on paper towel to get rid of excess colour on paintbrush.
- Dip q-tip in water and rub onto the area to remove any leftover acetone.
How to Fix the Heat Stamp on the LV PSM #
On this episode of Keeping Up with the RepLadies, I’ve noticed an influx of newer members who are looking for the best Palm Springs Mini. So far, the top contenders are OC ($210) and Erica ($170) with Apple ($140) and Nancy ($145) as runner-ups. However… The general consensus is that the PSM is hard to replicate and the critique I hear most often is that the front tab is inaccurate (e.g. heat stamp is too deeply imprinted and/or wrong font is used for LOUIS VUITTON PARIS). Mine from Erica had similar issues (wonky font and waaay too deep). See how I transformed from this to this!
BEFORE AND AFTER PICS: https://imgur.com/a/RE49ktR
AUTHENTIC REFERENCES
I know some of y’all will complain that you prefer the deeper stamp before. Trust me, I see where you’re coming from, because some of these authentic stamps are barely visible for a $2000 bag! But this guide was made for those who wish to be as close to auth as possible. The tabs on the reps also look too thick and stiff, whereas the authentics look soft and pliable—almost like they’re “worn in.” Here are references of auth tabs that I gathered from various reselling sites.
MATERIALS
You will need:
- A couple of Q-tips
- A small container of hot to almost-boiling water (NOT lukewarm!)
- Caution — Disclaimer: I am not responsible for anything that goes wrong. Please use your own judgment.
- Patience…lots of patience…
- Paper towels for cleaning up
HOW TO GUIDE
This will take approximately 30 min, depending on how deep your current stamp is and what your desired goal is. It’s not hard but extremely repetitive, and I recommend putting on Netflix/YouTube/music so you don’t get too bored.
Here’s the photos for those who are more visually inclined.
Step 1: Grab a small container that can withstand heat (e.g. bowl or Tupperware) and either (1) fill it up with hot water from a boiler or (2) fill with cold water and microwave for 1 min. You should see steam rising, but test the water to make sure it’s not scalding since we’re working on leather.
Step 2: Dip your Q-tip into the hot water and apply over the heat stamp. Focus on the center and avoid the edges/canvas.
Step 3: Keep transferring water until the stamp is covered and you can no longer read the words.
Step 4: Hold the tab in between your thumb and index finger and press down as hard as you can and hold for a few seconds. Visualize yourself flattening the imprint!
Step 5: Massage the tab between your fingers, and roll upwards so there’s a slight curve. This is to create that “soft, pliable leather that’s worn in” look.
Step 6: Repeat Steps 2-5 until you reach your desired goal. If your water gets cold, reheat in the microwave for another min. (I did 5 rounds of this and reheated my water 3 times.)
Step 7: When you’re happy with it, clean off the tab with a paper towel and make sure to press into the leather to absorb the excess water.
And TA-DA! Your new and improved PSM is ready for more music festivals and bougie brunches.

